Reefing: It Should Be Easy and Straightforward!
Your objective as an instructor at Courageous is a “properly” controlled vessel. Properly controlled doesn’t mean that since you can handle the conditions, everything is hunky dory--the boat needs to be controllable by your students!! Judicious reefing can help accomplish this.
Reefing your boat should not make you feel like Courageous doesn’t believe in your skills. Instead, it should make you feel that you can allow the students to be on the helm and trim the sails in conditions that are likely too much for them without reefing. This should be one of your first thoughts when doing anything on a boat: “How will this help my students?”
Let’s look at how a reefing line is set up and led through its blocks on a Rhodes 19
The Reefing Line should be standard on nearly all R19s. It should be on the port side of the boom. Here is how it should be led, from forward to aft:
- Stopper knot in the forward end;
- through a block on the boom;
- through the jam cleat on the boom Photo for 1-3;
- through the mainsheet bail (in order to help keep it from dangling and catching on people when not in use);
- from bottom to top through the block on the boom end Photo;
- from the block to the reefing clew/cringle/grommet Photo;
- run through the grommet from port to starboard;
- down from the grommet to the boom, in between the aft end of the foot bolt rope and the clew slug Photo;
- bowline tied around the boom, inside of everything EXCEPT capturing the port side of the reefing line: Photo
Steps 8 and 9 are the difficult parts, as they mostly require having seen the set up before, and understanding why the line goes where it does. The objective is that the reefing line pulls down on the reefing clew on the starboard side, and pulls abaft on the reefing clew on the port side.
This allows the reefing line to work double duty: as the new/reefing outhaul flattening the foot of the sail, and as the line pulling the reef clew and the boom together keeping the boom raised to the correct height.
The proper installation of the reefing line should be regularly checked and not left until just before the immediate need for reefing.
Reefing your Rhodes 19 on the dock
-
- Loosen main sheet, reefing line, boom vang
- Start to raise mainsail/luff/halyard in the normal way, until the point where it is easy to attach the reefing tack ring
- Attach reefing tack to carabiner or hook
- Raise halyard until luff is properly flat (tight! pull HARD!) Photo
- Once halyard is properly raised (luff should be flat, no creases, reefing hook or carabiner should be secure, etc.) and cleated:
- Reefing line is tightened from forward of the port side block, near gooseneck: it should be able to be pulled from the cockpit easily because the block allows the force to be re-directed abaft, but if the block is less-than-ideal, pulling it from forward will help.
- The reefing line should be pulled pretty much as tightly as possible--it will bottom out on the knot of the bowline in the reefing line
- If the boom is not as high as you would expect without a reef (ie, horizontal), then something is wrong. (Boom vang? Mainsheet? Reefing line pulled tight enough? Reefing line tied on properly?)
- Excess lower part of the reefed sail is now ready to be rolled up
- The roll should be tight while the reefing ties should not. We don’t want pressure on these sail cringles/grommets from pulling hard on the square knots, as these grommets are not reinforced!
- If you see creases at the reefing cringles/grommets after tying the reef ties, they are too tight, and there might be other rigging problems (i.e. something is pulling on the sail in the wrong way/wrong direction!)
- Reefing clew should have a reef tie as well, making for three reef ties on a R19 (the reef tack doesn’t have a tie).
- Reef ties should be tied with a reef knot, as they are easy to put in and easy to remove when shaking the reef out.
The completed reefed sail should be smooth and flat. Creases/scallops along the luff indicate that the halyard is not tight enough and creases along the foot or around the reef grommets indicate the reef ties are too tightly tied.
Deciding to Reef Underway
- VERY/MOST IMPORTANT: Are the students having a hard time handling and steering the boat?
- Is the boat heeling/broaching uncomfortably?
- Are you needing to luff/flog the mainsail in order to not be overpowered, either by gusts or by the sustained wind??
- Difficult for students to use the mainsheet?
- Are there whitecaps in sight? (The whitecaps we experience in Boston Harbor are common above 12kts--the wind speed around which we want think about reefing)
- Repeated capsizes/broaches while teaching are an unacceptably sure sign that you should already be reefed.
Reefing Underway
While reefing underway is the same process as reefing at the dock, it can feel much more hectic for the following reasons:
- The boat is moving and situational awareness is much more important
- The noise-volume of the wind and luffing sails makes for difficult communication
- More care must be taken with the luffing mainsail and boom
To Reef While Underway:
Note: Make sure your boat has a decently long runway in safety position in order to have time to work out any issues that may come up during the reefing. Reefing while underway can be a very quick process, but only if it has been practiced and the process is clear to the entire crew. At least a full minute of close-reach distance on port tack, under full jib and eased mainsail, should be sighted and planned out before the reefing procedure begins. Don’t get yourself into a worse situation by not having enough runway with your mainsail ⅓ down and the boom at deck level!
- Find the correct course: Close reach/Close-hauled on Port Tack
- Skipper: Go into an upwind point of sail on port tack (a high close reach, where the aft end of the boom is just above the leeward stern corner, is a great balance between having the boom close enough amidships to work with while not luffing in the crew’s faces). Try to maintain this course/angle exactly, until the reef is fully in, in order that the boom and mainsail are not luffing wildly!
- Skipper: Communicate with the crew that you are now ready for the reef to be put in
- Ease the sail in three ways: Mainsheet, Vang, Halyard
- Skipper/Main trimmer: Ease the mainsheet
- Crew: Ease the vang
- Crew: Slowly ease the main halyard down, only enough in order to get the carabiner/reef hook secured to the reef tack
- Another crew member can help keep the boom from excessively flogging against deck and crew, but if they are small or less competent it is better for them to just stay clear.
- Attach the Reef Hook/Carabiner to the Mainsail Reef Tack
- Crew: Secure the reef hook or the carabiner to the reef tack. If a reef hook is being used, this may require some attention so that the hook does not fall out of place.
- Re-raise the Halyard
- Crew: Tighten the main halyard back up. FLAT! TIGHT! On a Courageous R19, the chance you are going to over tighten the luff is slim, especially because once the sail is back in the wind, the halyard will stretch back out and you will lose some of that tightness anyway.
- Tighten the Reefing Line
- Crew: Now that the front/luff of the sail is in place, the reefing line can be tightened in order to adjust the foot of the sail into place.
- Crew: While the reefing line is being tightened, it can be helpful to make sure that the excess bottom of the mainsail is falling cleanly to one side (usually the port side for standard rigged R19s), in order to easily roll and tie it up later.
- Crew: If possible, the boom should be lifted/guided up to the reefing grommet by a crew member or even the skipper, while the reefing line is being tensioned! This way, the crew tensioning the reefing line can get the line taut without having to work at lifting the boom through all the friction of the blocks.
- Luff and Foot FLAT
- Both the luff of the sail and the foot of the sail should now be FLAT. In addition to the reduction of sail area from reefing, this flatness will create better boat control in high winds.
- Secure the excess bottom of the mainsail
- Roll the excess foot of the mainsail from its bottom toward the boom
- The roll should be tight, the reefing ties should not be. Pressure at these grommets/cringles can rip the sail:
- If you see creases at the reefing cringles/grommets after tying the reef ties, they are too tight, and there might be other rigging problems.
- Reefing clew should have a reef tie as well, making for three reef ties.
- Reef ties should be tied with a reef knot, as it is easily put in, and easily removed if the reef needs to be shaken out.
- Problems?
- If the boom is not as high as you would expect without a reef (ie, horizontal), then something is wrong.
- Did the boom vang prevent the halyard or reefing line from being pulled in all the way?
- Did the mainsheet do so?
- Is the reefing line pulled tight enough--it should have brought the reef clew (bottom back corner) of the mainsail against the boom?
- Is the reefing line tied on properly?)
- Is the reefing line cleated and staying in place?
- If the boom is not as high as you would expect without a reef (ie, horizontal), then something is wrong.
Video of reefing underway
While this video depicts a boat that is a bit bigger than the R19s, it is a clear example of reefing underway. Notice the following:
- The skipper is able to maintain the angle of the boat such that the boom stays in nearly the exact same spot during the whole operation
- How flat the sail is from this stern angle: the foot is flat, the luff is flat, and the sail in general doesn’t have much belly (At the end of the video, you can see the lower part of the sail has practically no profile when sheeted in for close reach/haul.
Reefing Photos
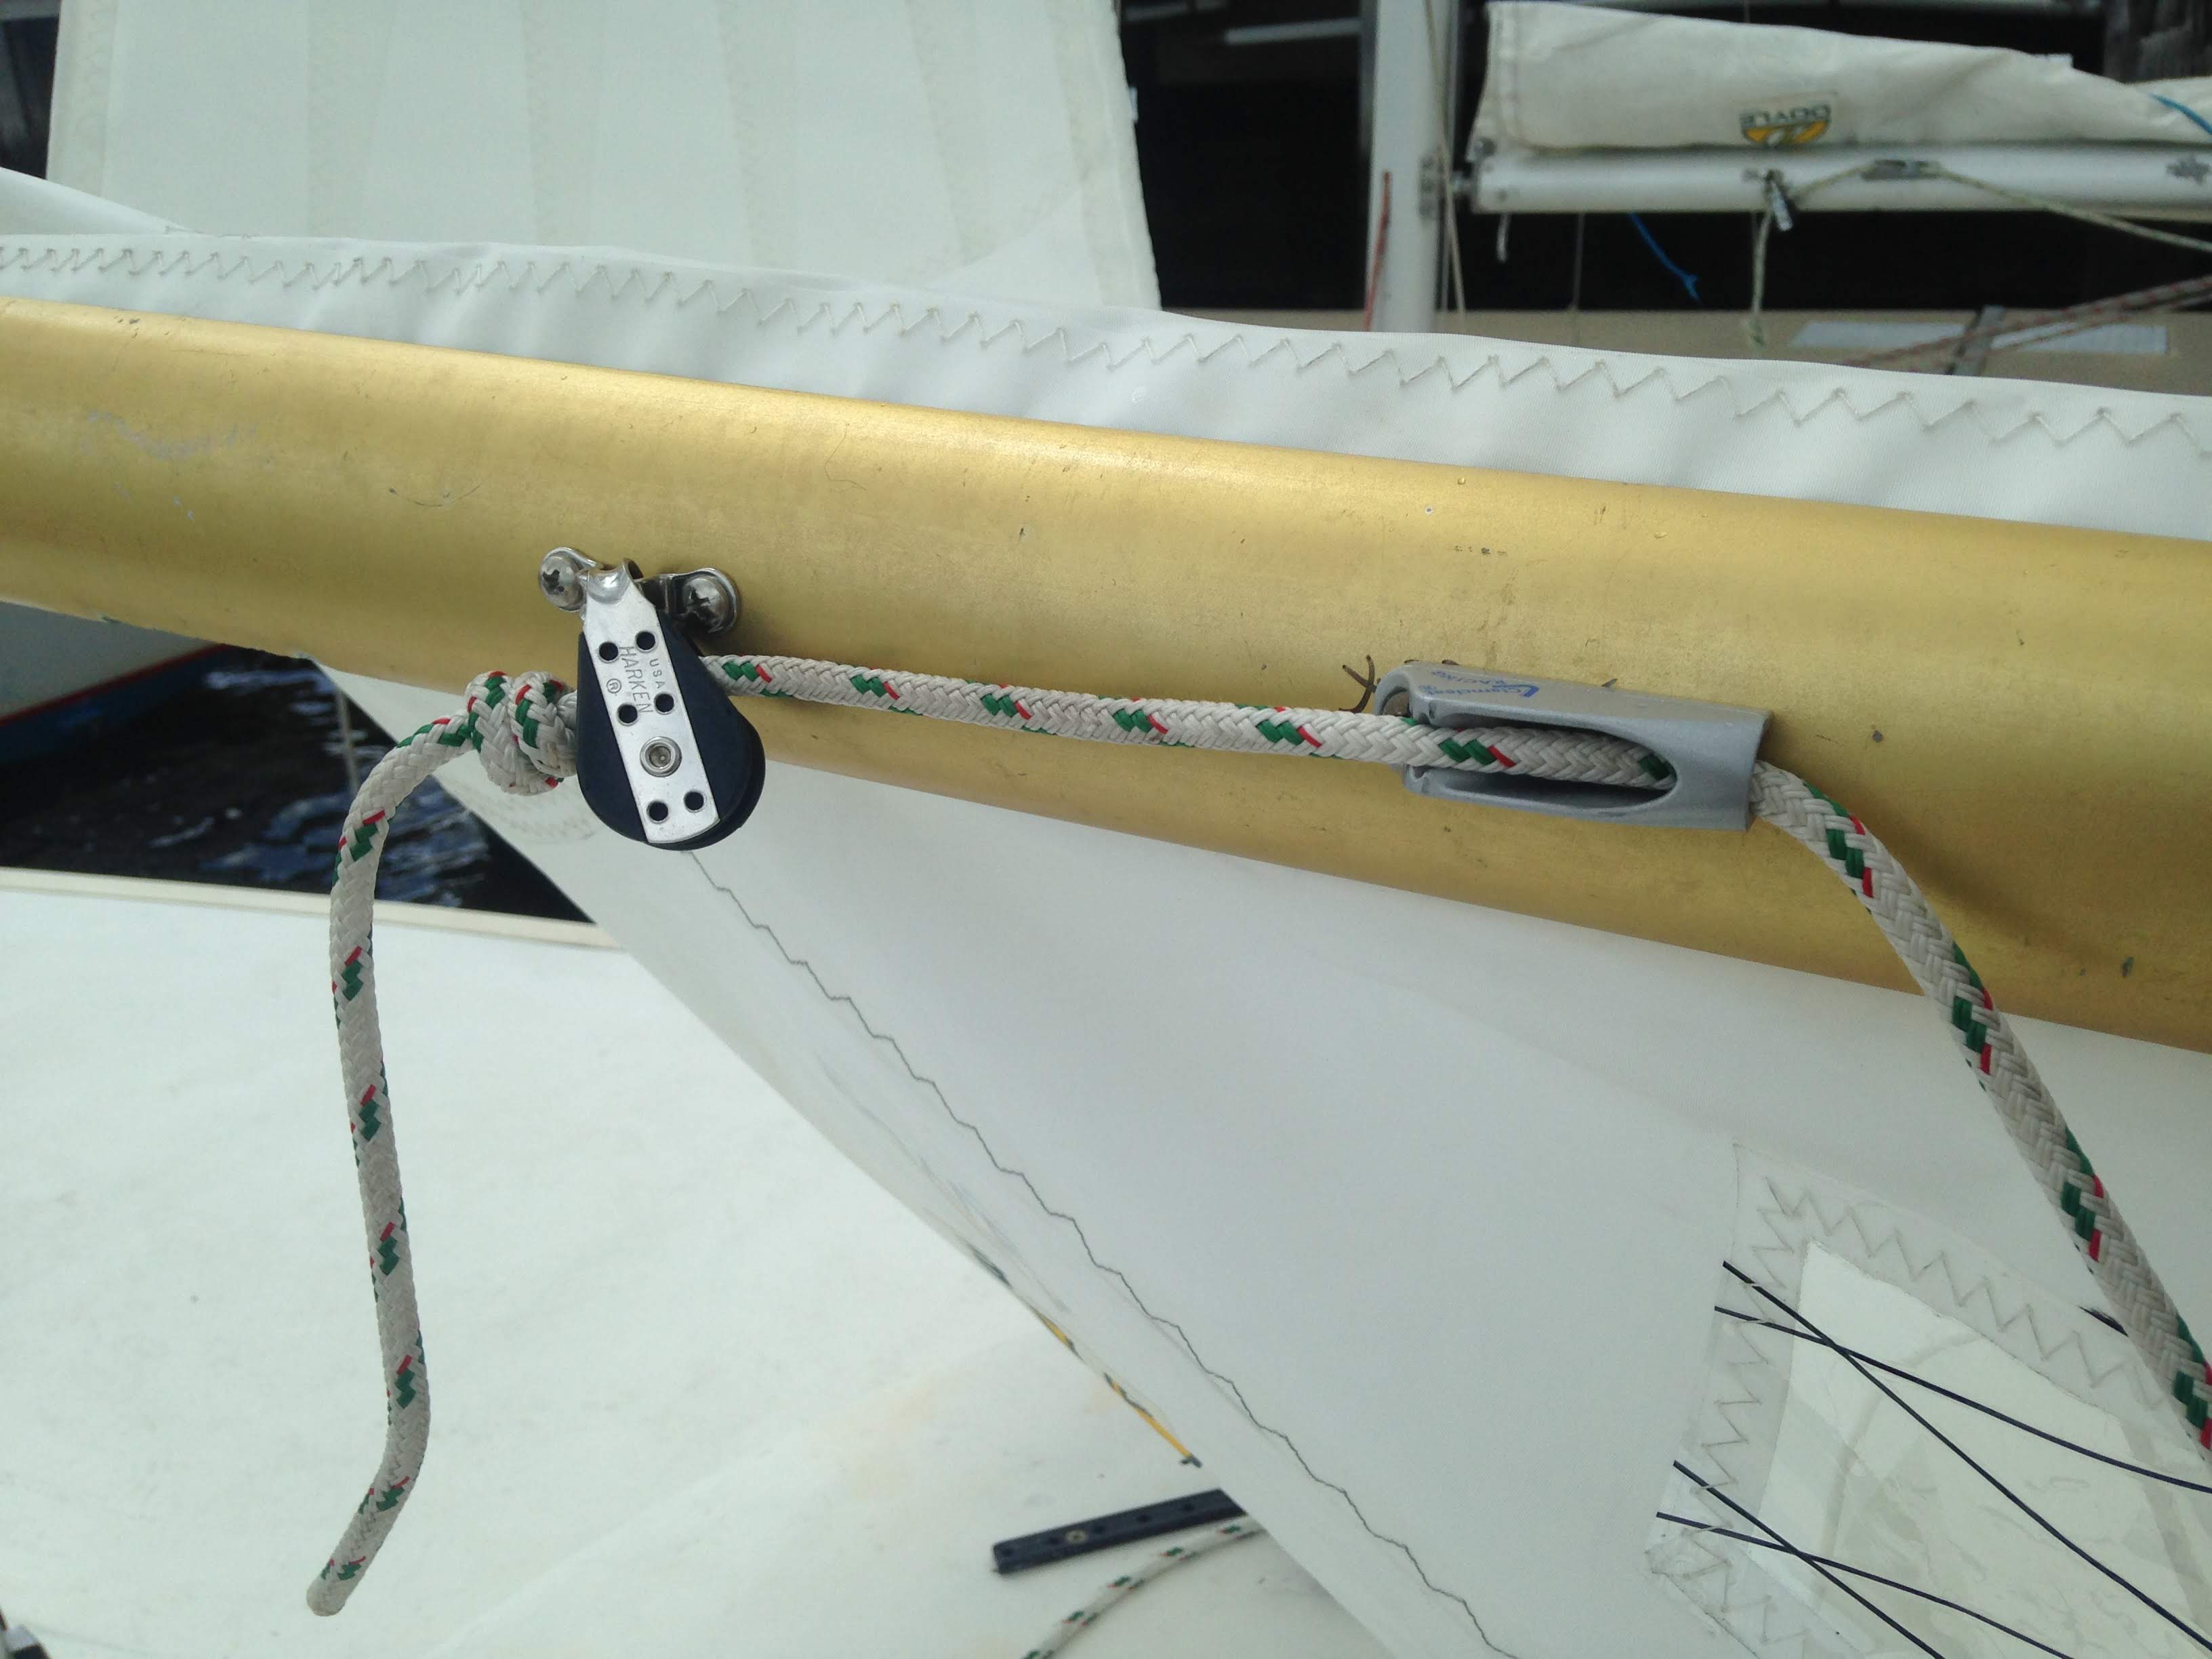
Photo 1. Port side of boom. Mast is to the left, stern of boat is to the right. Reefing line is the white line with green fleck. From this end of the reefing line, the line is tightened--pulled through the block and cleat.
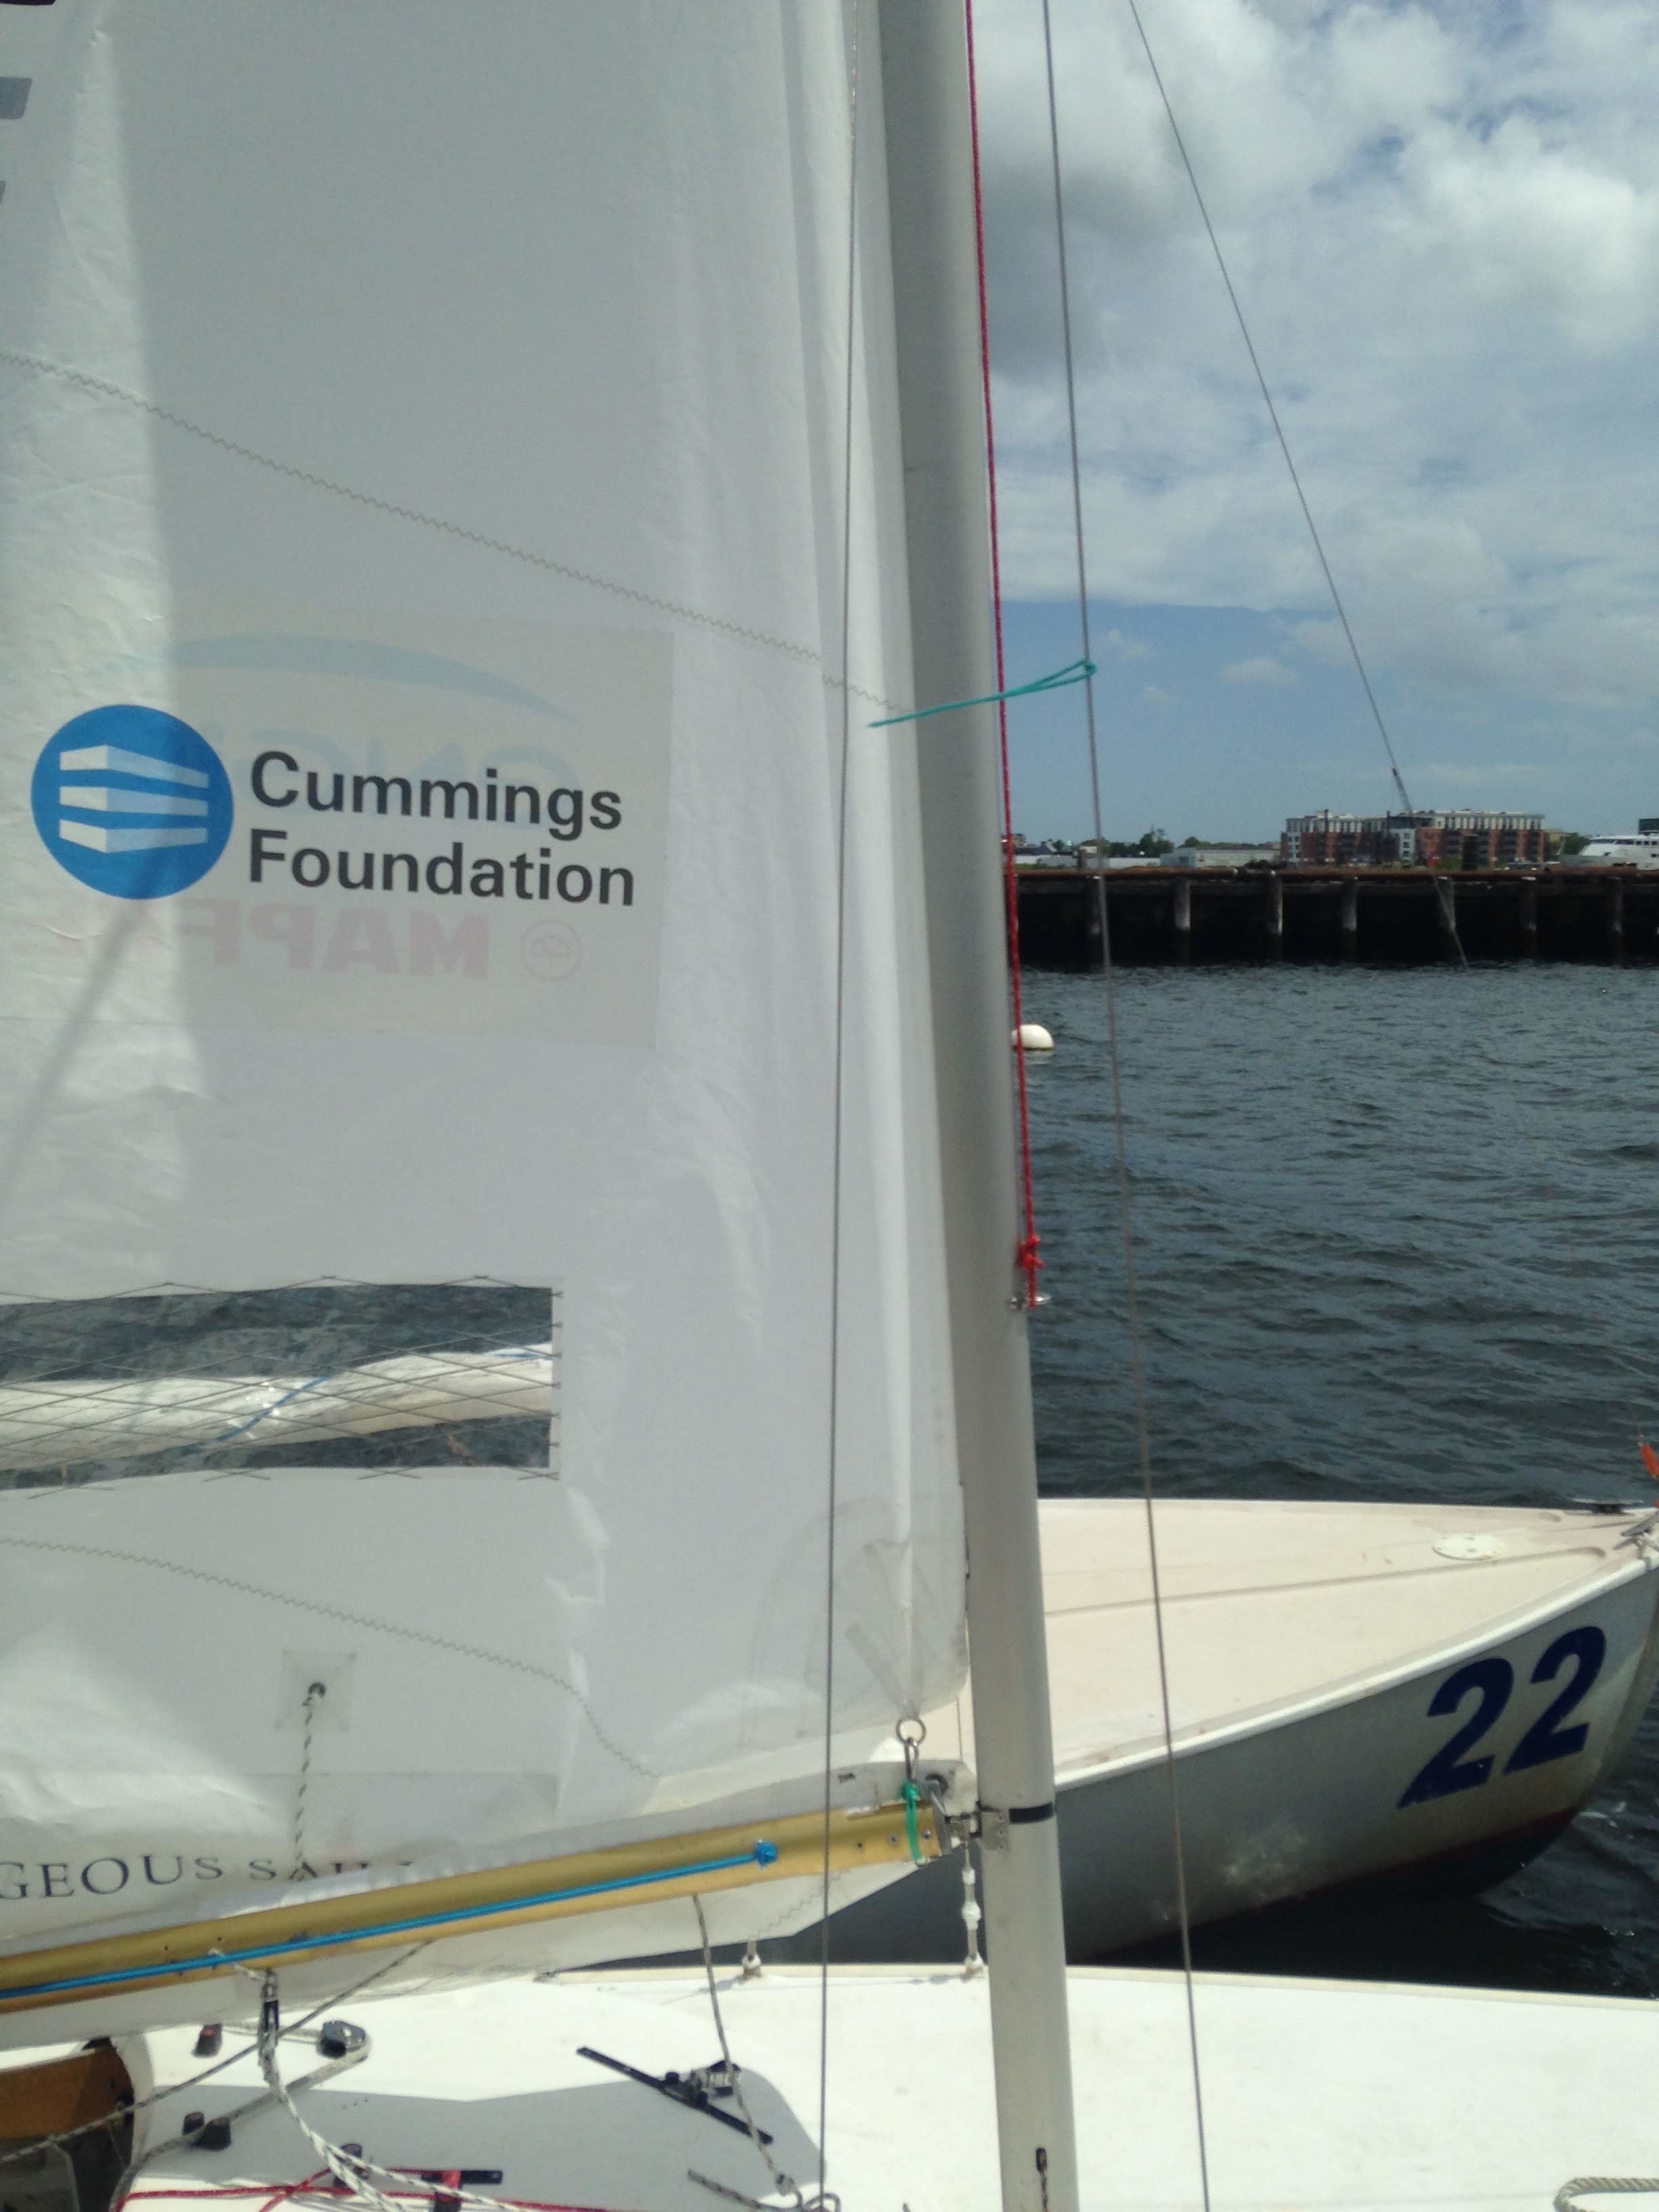
Photo 2. The tightly raised halyard/luff of the sail. No creases/scallops. Starboard side. Next step is to tighten the reefing line, which will pull the boom up.
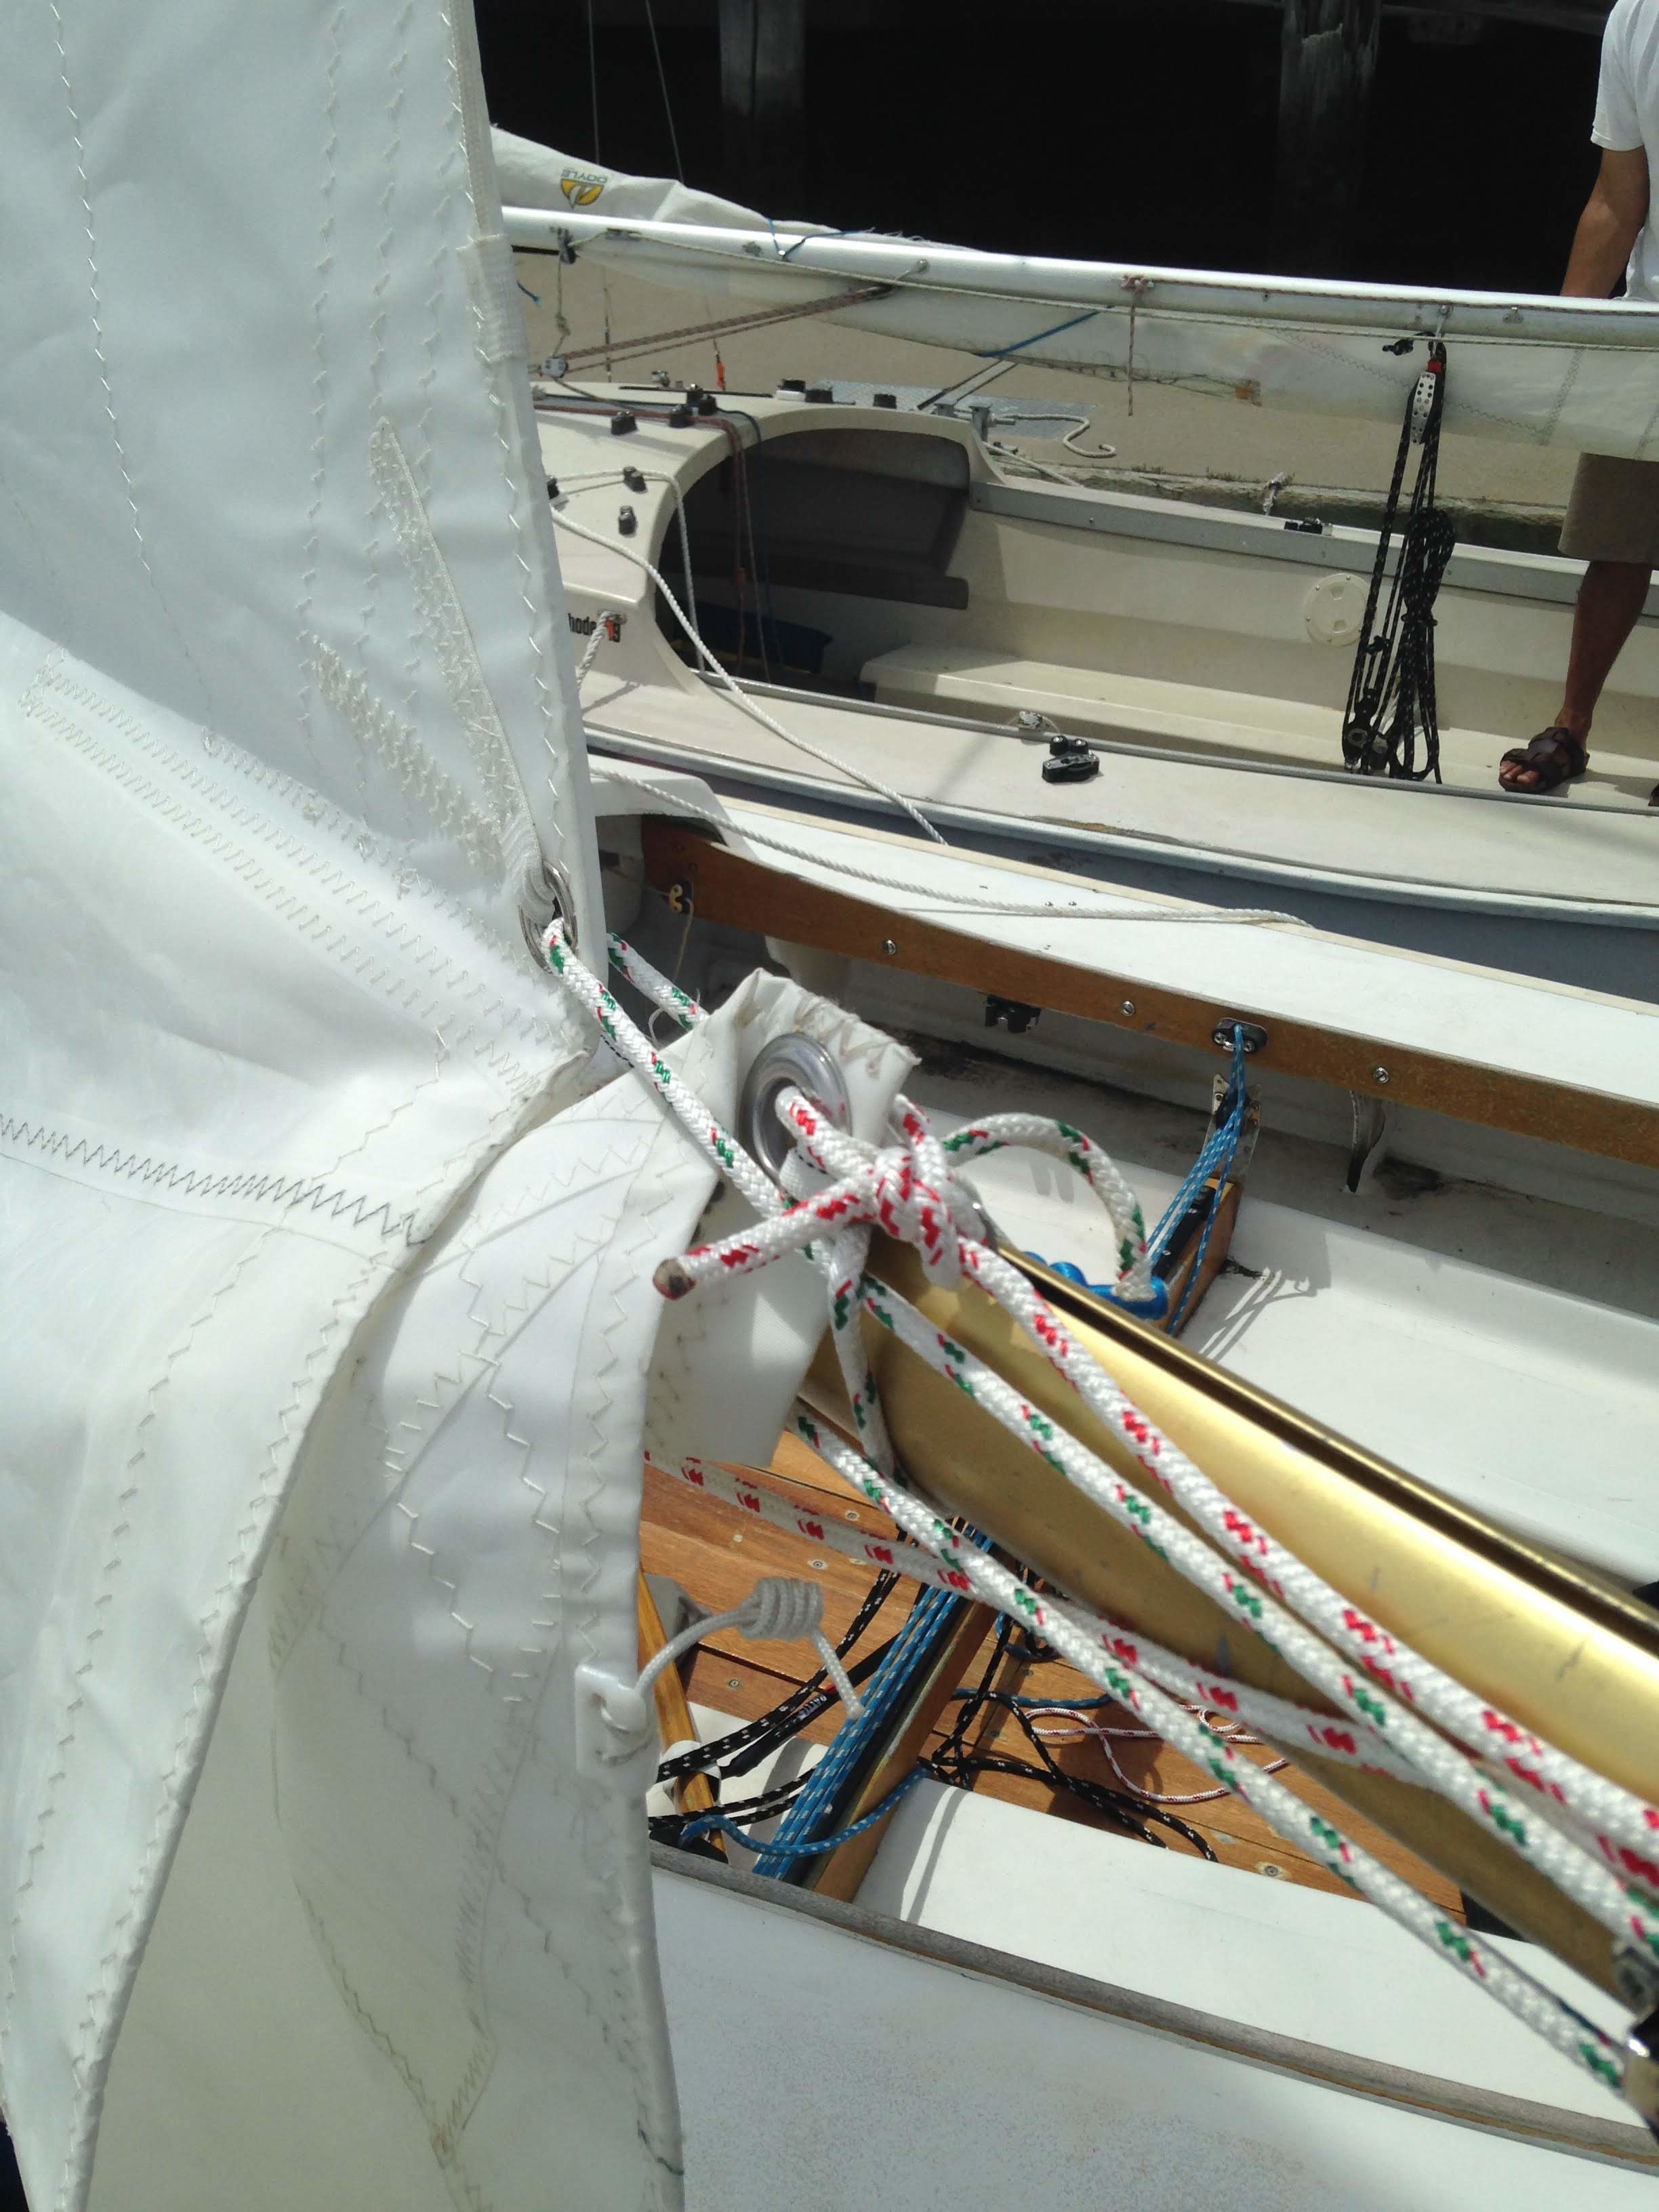
Photo 3. Port side. The new clew, after the reefing line is pulled tight. The close side pulls abaft. The far/starboard side (not able to be seen) pulls downward.
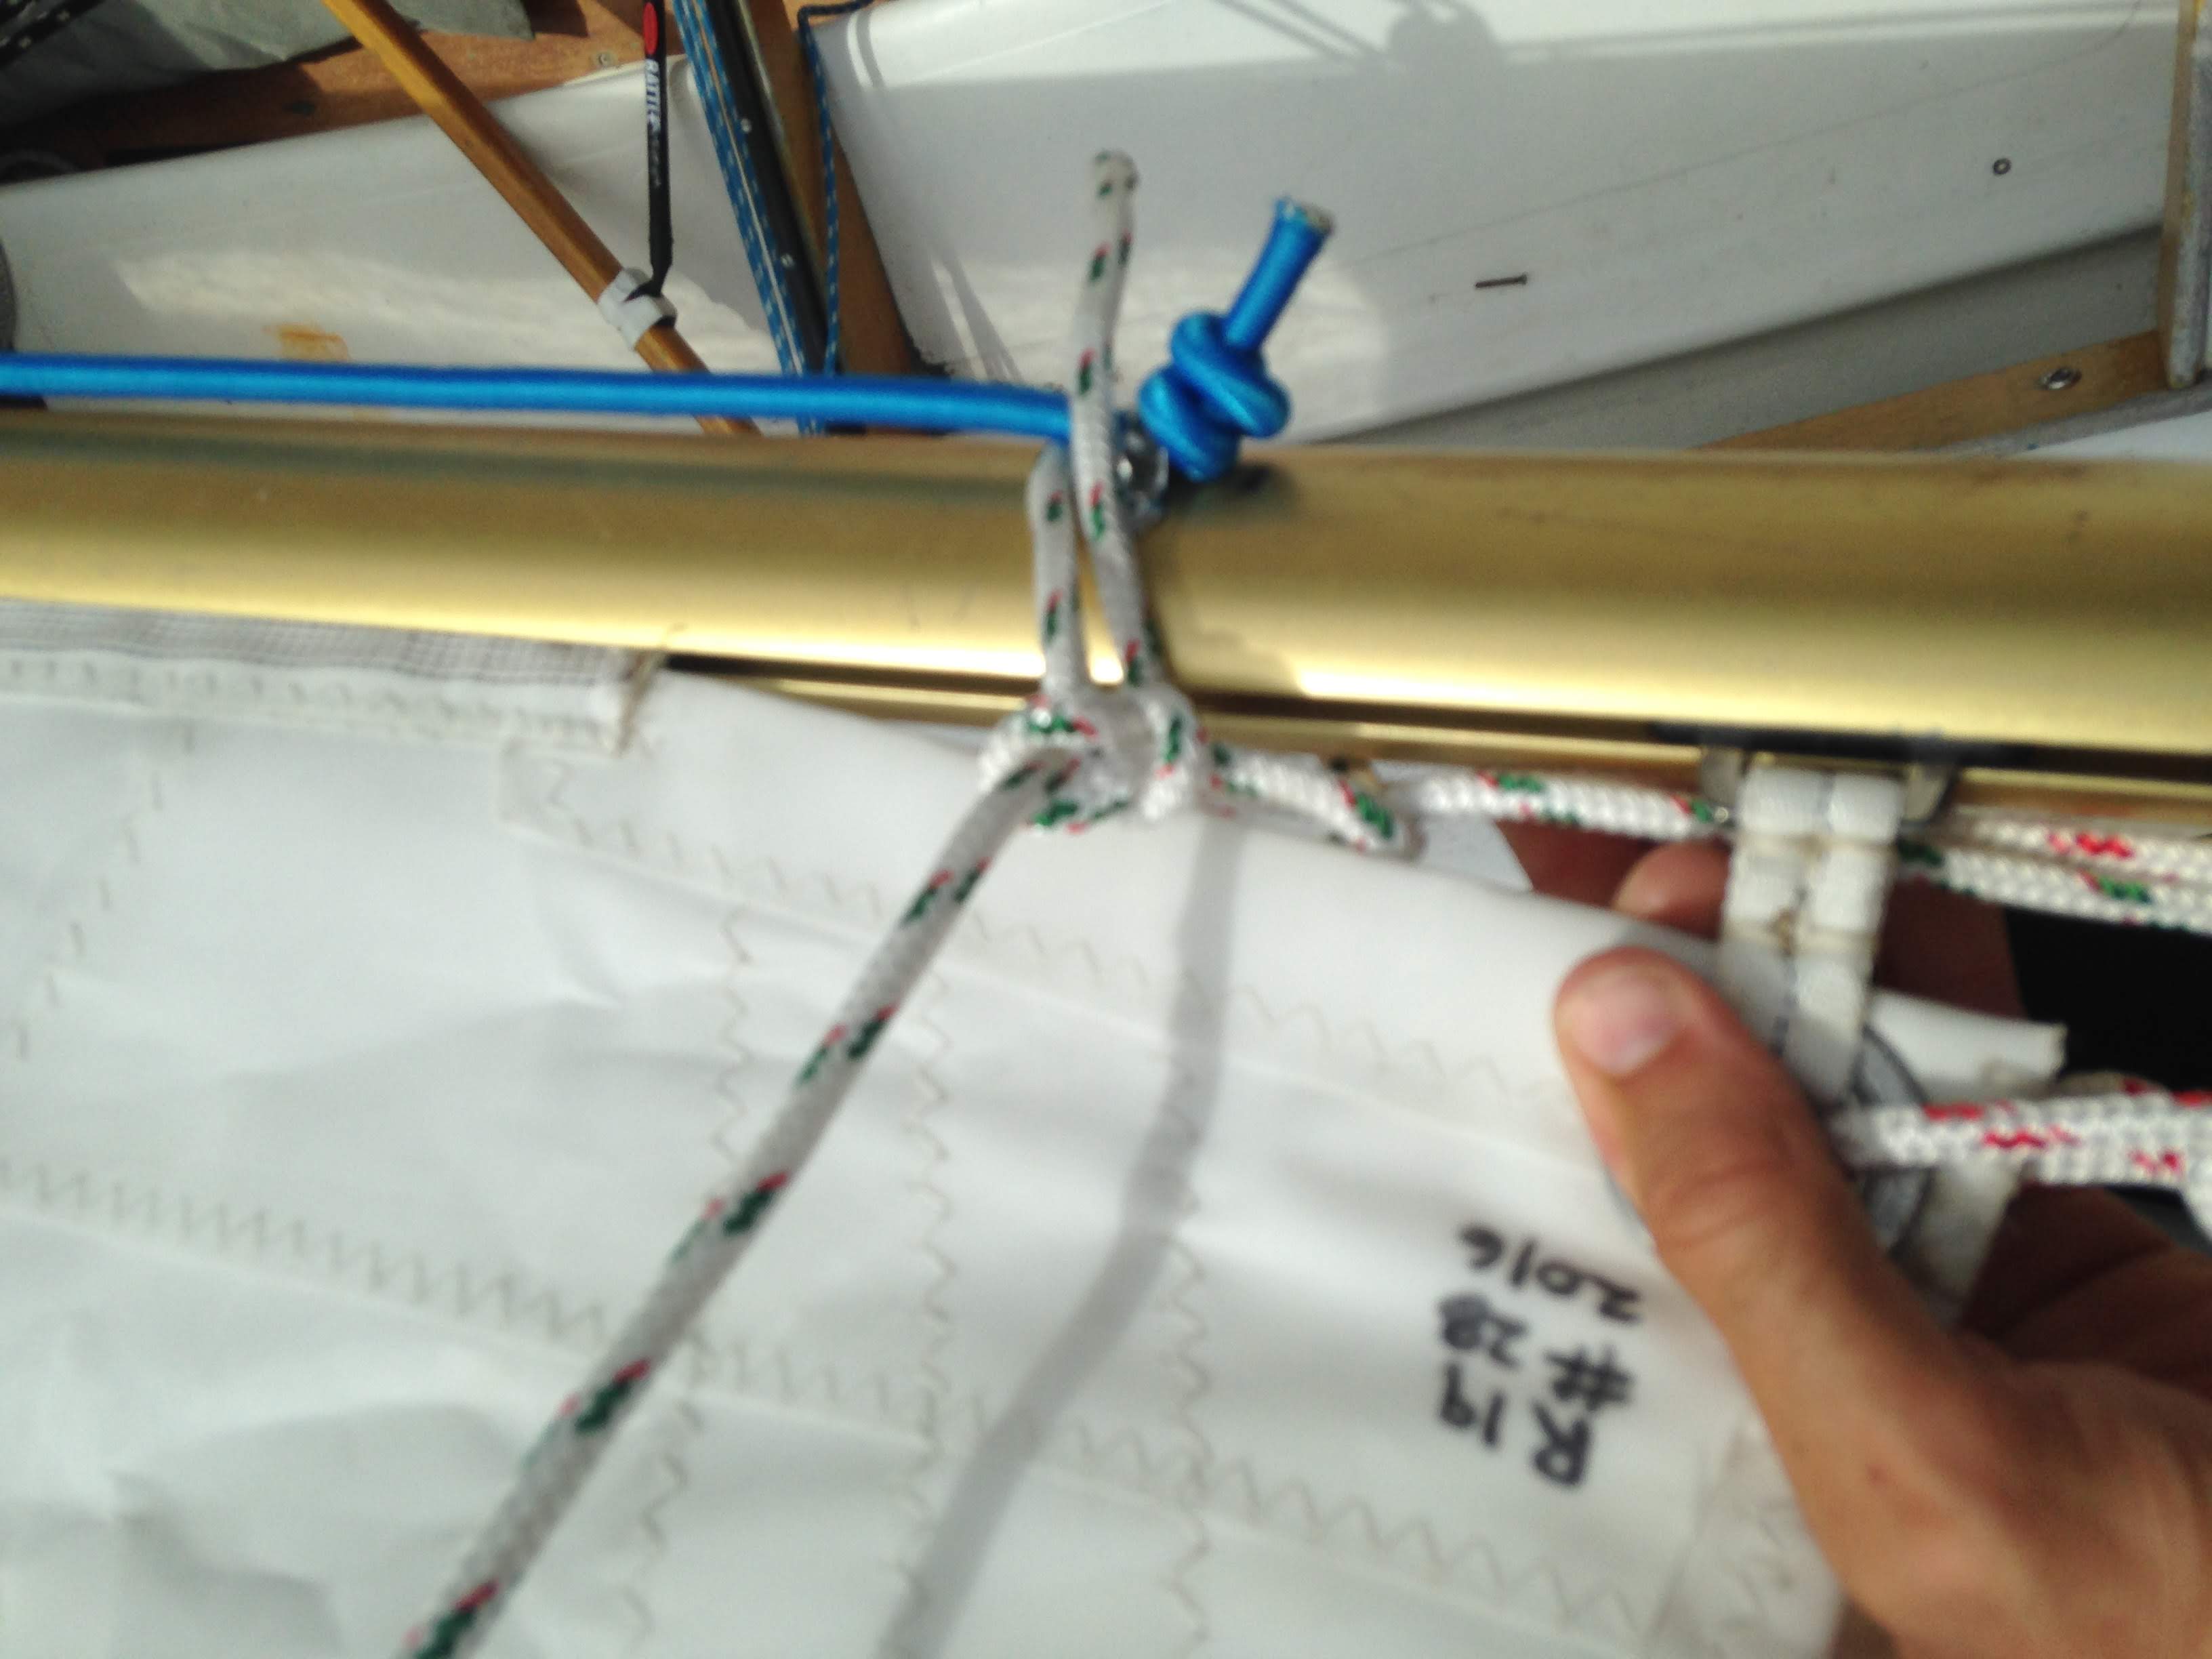
Photo 4. The correctly tied aft end of the reefing line. A bowline tied between the foot bolt rope and the clew slug, inside of all boom attachments, except the port side of itself (not perfectly pictured, but the thumb is pointing towards this.)
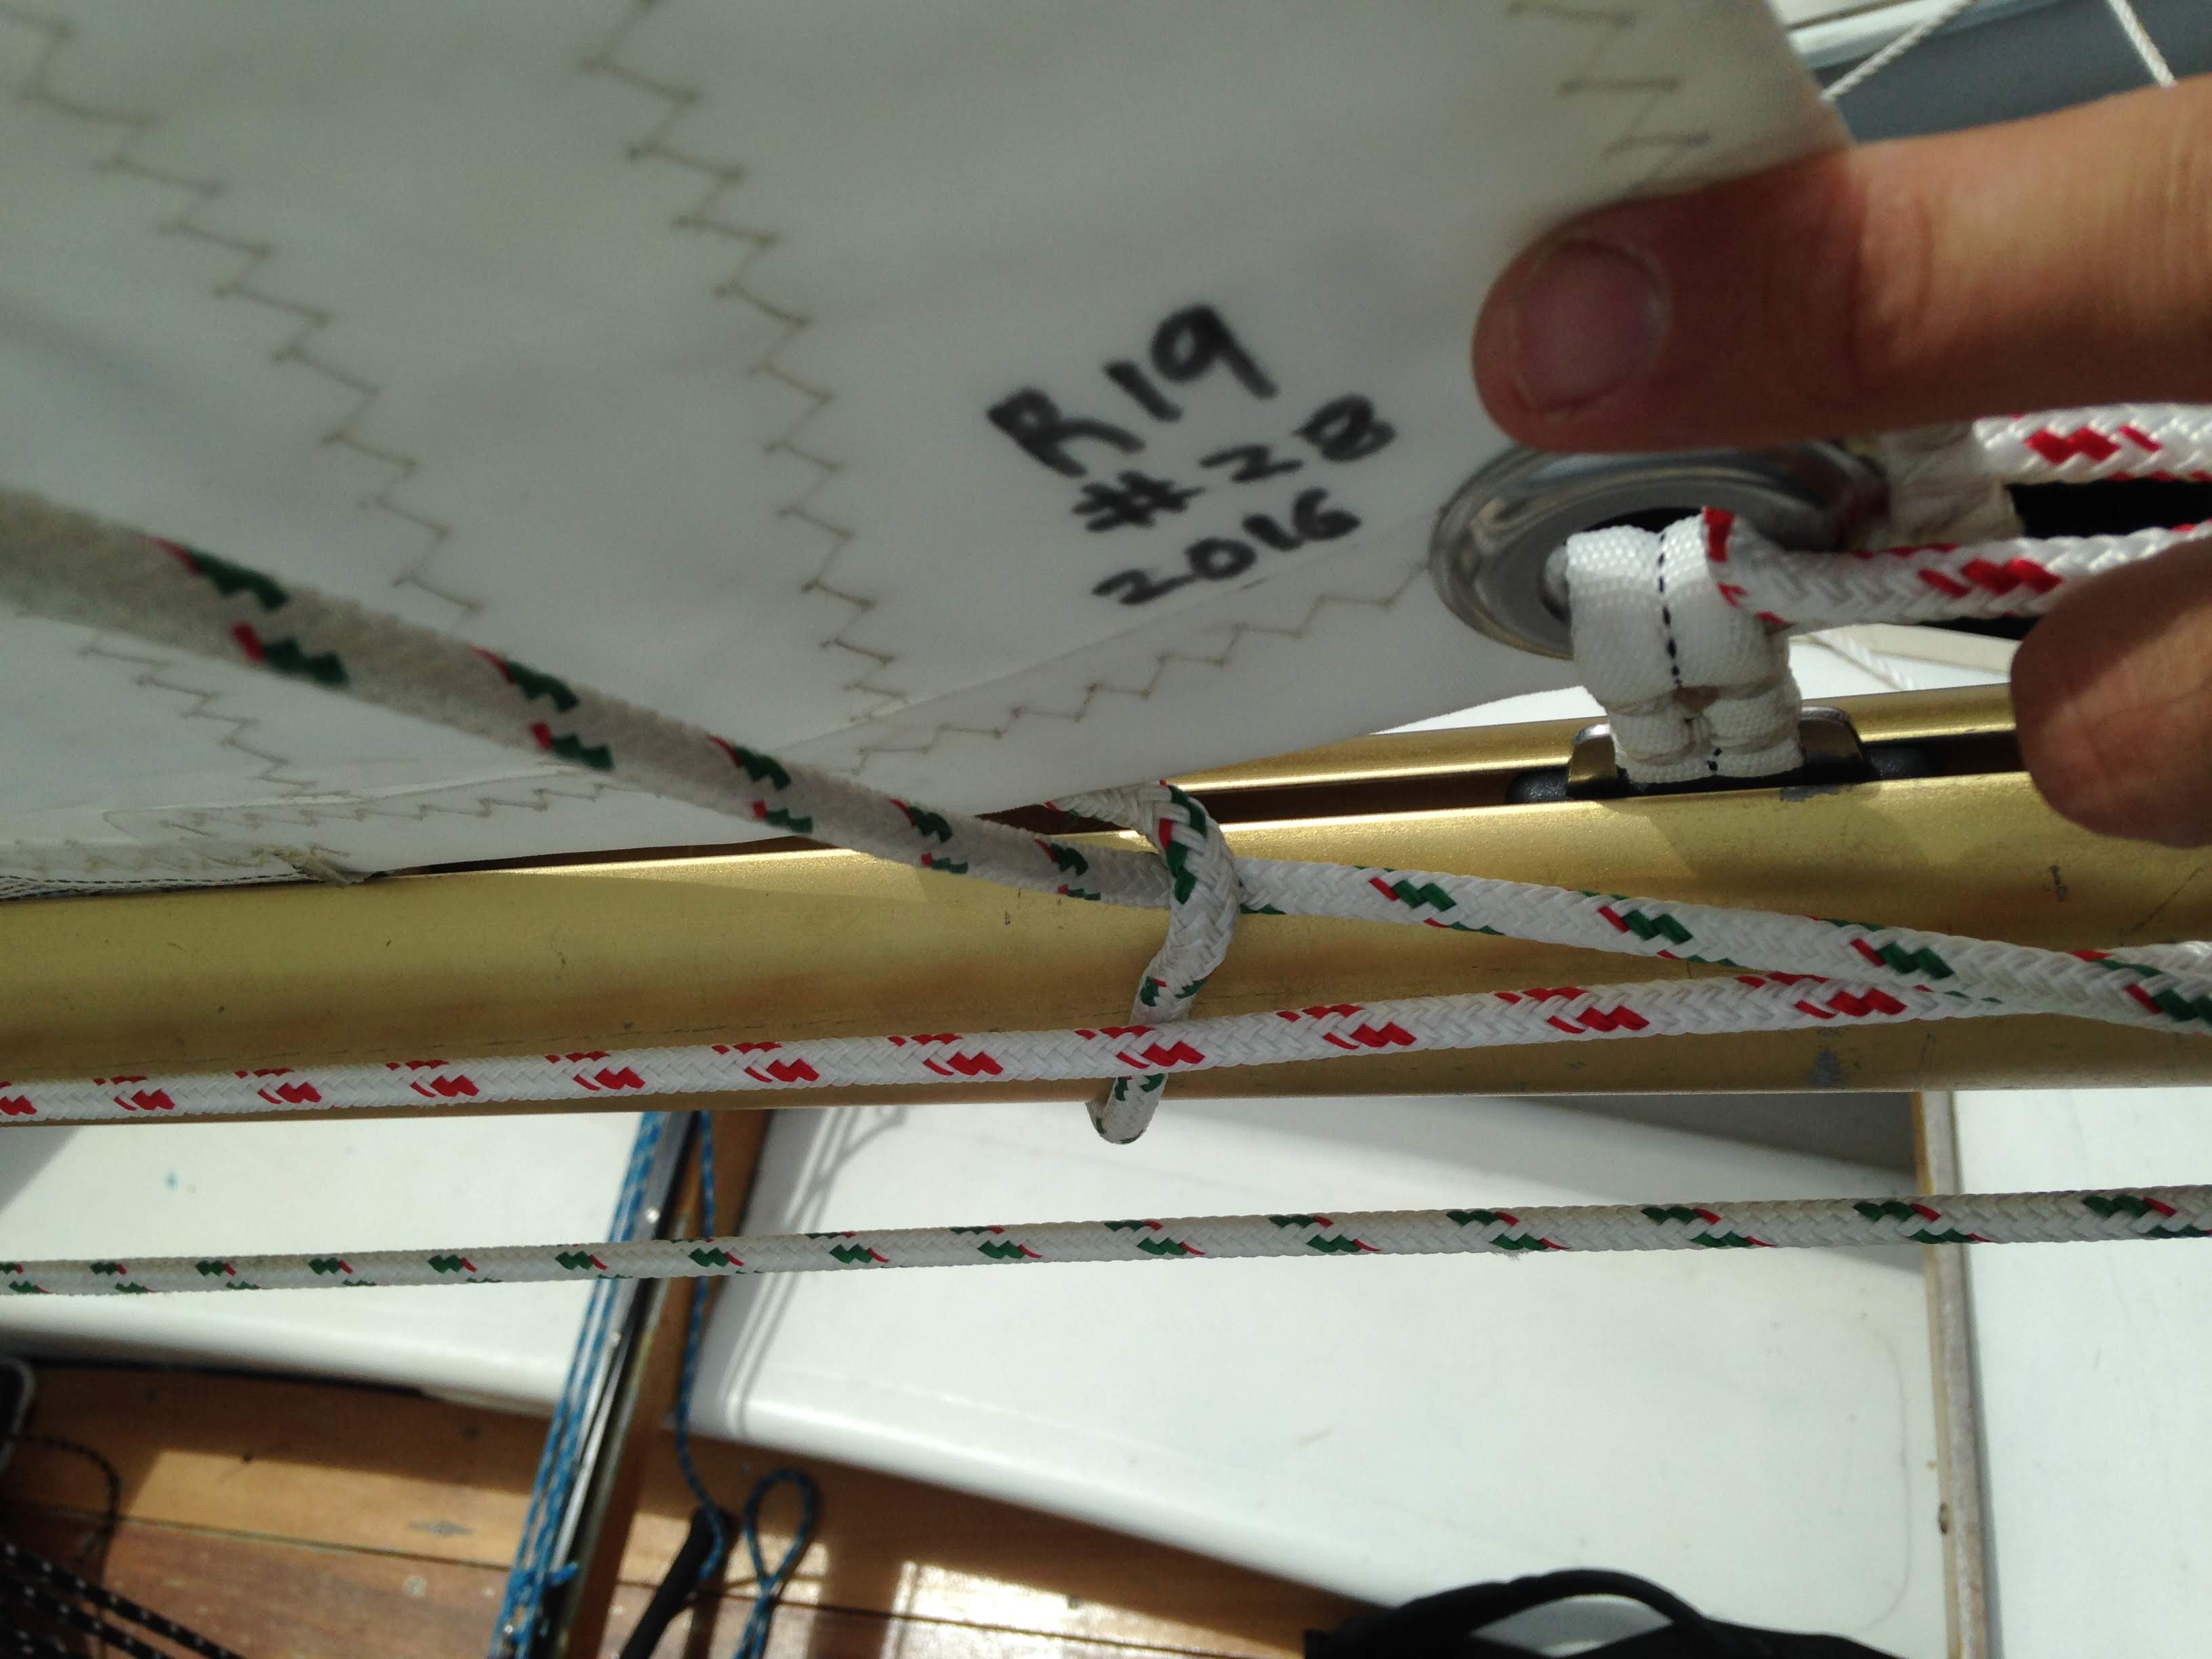
Photo 5. The port side of the aft end of the reefing line. The loop going around the boom is the loop of the bowline. The white line with green fleck coming down from the left side of the picture is the reefing line.
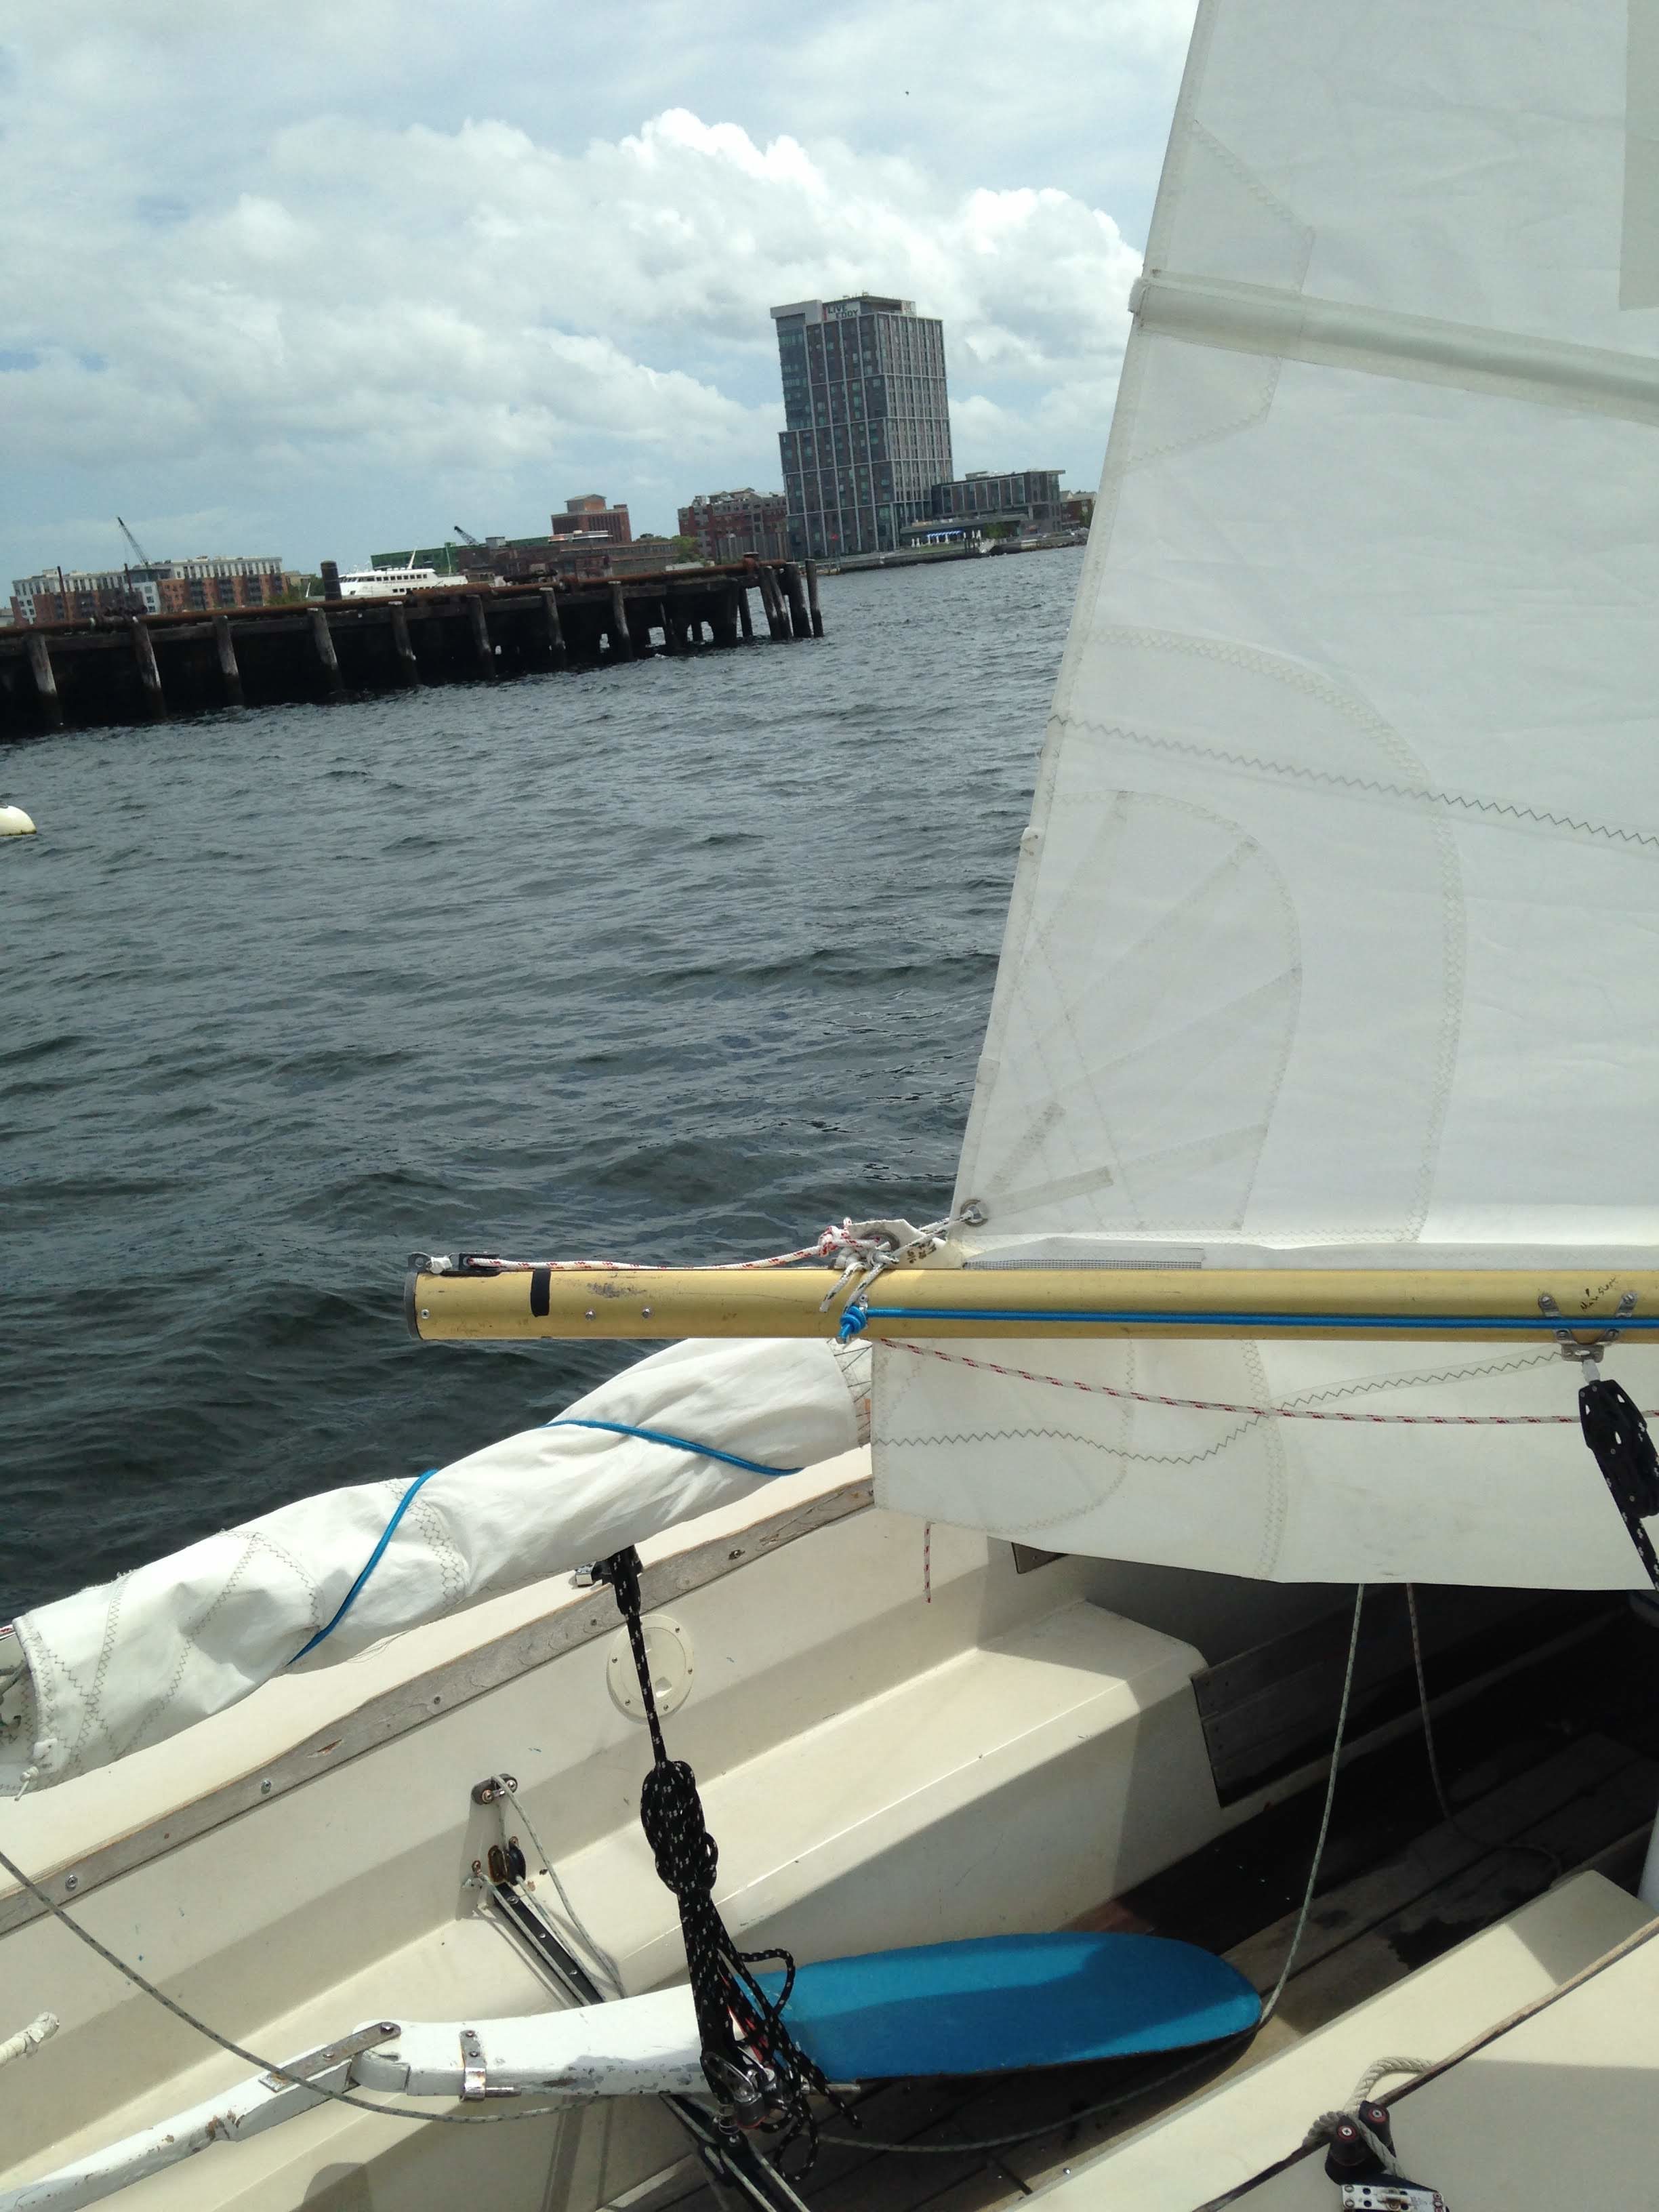
Photo 6. Starboard side. This reefing line is improperly tied, as it should be inside the blue bungee!! (see two images above) But, besides that, the foot is nicely flat and the excess sail looks ready to be rolled up.
White line with red fleck is the regular outhaul--slack and not in use while reefed. White line with green fleck is the reefing line. This side of the reefing line pulls downwards to the boom, raising the boom to the right height.